1. Add places and calculate distance
Tap the upper right corner![]() and select “Places”, then tap
and select “Places”, then tap ![]() “Add Location” below to display the place search Window. Enter the place name in the search box, the corresponding place names and distances will be displayed below. Click the place name to add it to the place list. If you can’t find the place, you can try changing the country and region on the left and search again.
“Add Location” below to display the place search Window. Enter the place name in the search box, the corresponding place names and distances will be displayed below. Click the place name to add it to the place list. If you can’t find the place, you can try changing the country and region on the left and search again.
Click “Update Location” below (if a location permission prompt appears, please select Allow). The name of the current location will be displayed at the top, and the distance between the current location and other locations will be displayed on the right side of the location list. Click the upper right corner
 ![]() and select “Map” page, the map will focus on the current location. You can also update the location on the “Map” page by clicking below.
and select “Map” page, the map will focus on the current location. You can also update the location on the “Map” page by clicking below.
Clicking a place or the name of current location, following options will be displayed:
- Add Location: Add the current location to places list.
- Set as starting point: Change the starting point for distance calculation. Enter “Map” page(Tap the upper right corner
 ), the map will also focus on the starting point.
 - Edit: Edit the location name or add notes in the details. You can also set the location group so that the locations in the same group are displayed together in the location list.
- Delete: Delete the place
- Weather: Display the weather of this place for the next 24 hours and the next 7 days
- Street View: Show street view of this place (only supported in some areas)
Click the distance number next to the place to display the arrival route from the current starting point to the place on the “Map” page (you can choose from four routes: walking, driving, cycling, and bus, may not be supported in some areas).
Click “Edit” in the upper left corner, select several locations and enter a group name. These locations will be grouped and displayed together in the location list.
Youtube Demo
2 Add trace
Tap the upper right corner![]() and select “Map”, click “Start Recording” below to start recording trace.
and select “Map”, click “Start Recording” below to start recording trace.
The track is named after the current location. You can click the upper right corner and select “Track”, long press the “Recording” track and select Edit to change the track name.
Note: If the track is offset from the real track, you can click the upper right corner and select “Settings”, try to turn on or off “GPS Location Fix” and then record again.
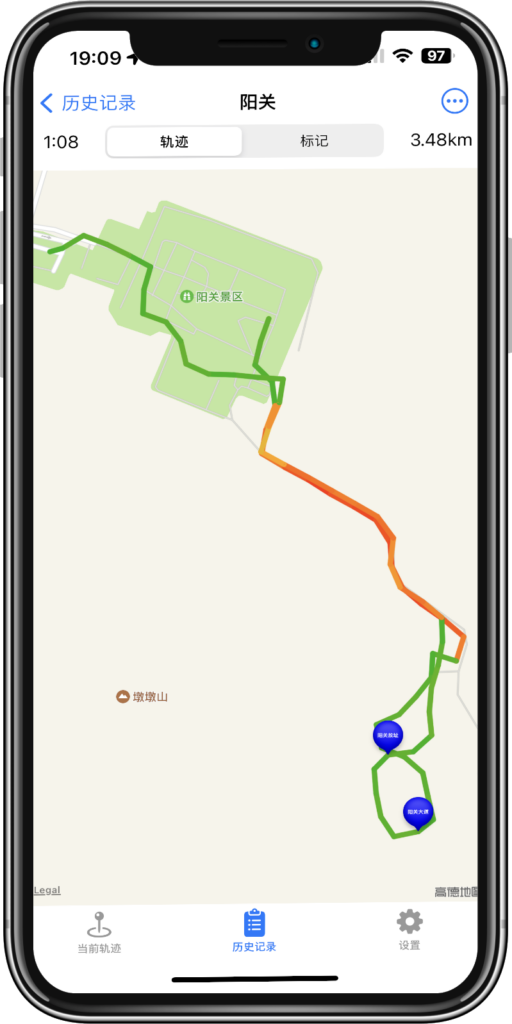
The track is displayed in a gradient of red, yellow, and green depending on the speed. The speed displayed in yellow is about 18 km/h. The speed less than 18 km/h is displayed in green. The speed greater than 18 km/h is displayed in red. Usually, green can be used as a walking track, yellow as a riding track, and red as a transportation track.
You can select step length (10 – 200 meters) on the settings page, and this app will add a recording point per you selected length (the change will take effect in new trace). If the current GPS accuracy(the radius of location circle) is greater than the step size, “Weak GPS Signal” will be displayed on the map. The step length can be adjusted to increase the accuracy tolerance range (it will not affect the current trace’s step length). If there is no GPS signal, “No GPS Signal” will be displayed on the map.
Tap the upper right corner![]() , following options will be displayed:
, following options will be displayed:
| End | End tracing. If you want to continue tracing, you can enter “History” page, click on the track name, click upper right corner |
| Auto Focus on Current Location | Every time a new trace point is added, the map will automatically focus on this point. If you want to browse other part of the track, you can cancel this option so that browsing will not be interrupted. |
| Route | Search and select a destination to show route from current location to the destination on the map. You can change route type in destination selection UI’s upper right corner. |
| Reference | Select an old track and show it on the map as reference, You can switch to different year’s track list in track selection UI’s upper right corner. |
| Marker | Add marker to current location, see section 4. |
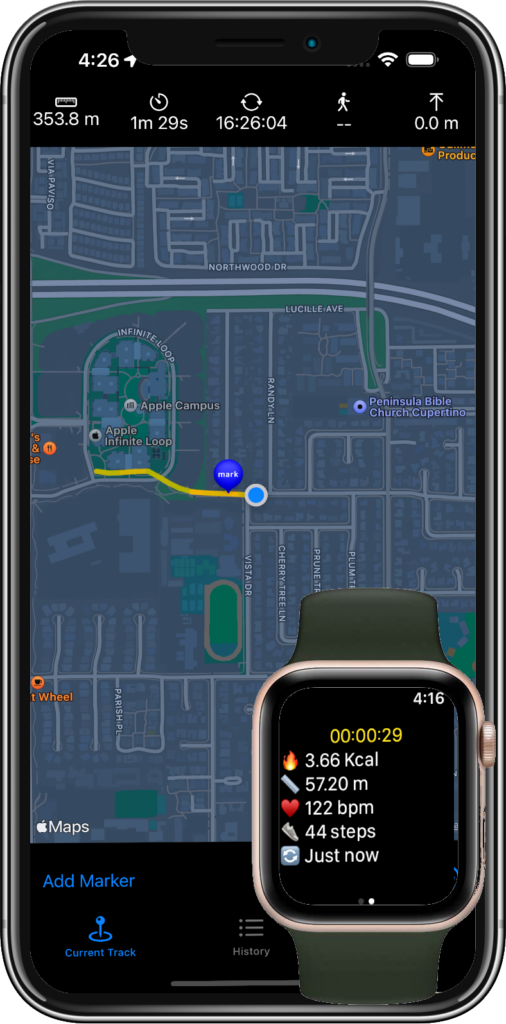
Information related to the current track will be displayed on the top of the map, including:
 |
Travel distance |
 |
The number of steps taken in the track |
 |
Distance of elevation gain in the track |
 |
Last track update time If you find the update time is stopped, please enter the settings page, click “Location Permission Settings“, select the location, and select “Always”. |
 |
Travel duration |
Youtube Demo
3. Use Apple Watch to record tracks
Open “Journey Tracker” app on Apple Watch, if there is health information read and write permission prompt, please choose to allow all. Then click “Cycling”, “Running” or “Walking” according to the situation. Open the “Journey Tracker” app on your mobile phone, and a track will start to record. If there is a location permission prompt, please select “when in use”. Then you can view the track traced by Apple Watch on your mobile phone. During this period, Apple Watch can continue to record data after the mobile application exits, and it will automatically synchronize with mobile app when it is opened again.
The information displayed on the watch app is:
| 🔥 | Calories burned on journey |
| 📏 | Distance traced in the track |
| ♥️ | Current heart rate (beats per minute) |
| 👟 | The number of steps taken in the track |
| 🔄 | The time lapse between the latest GPS coordinates sent to the phone and the current time (show “Just” if less than 60 seconds). |
| 🔋 | Battery power, displayed🪫if less than 20%. |
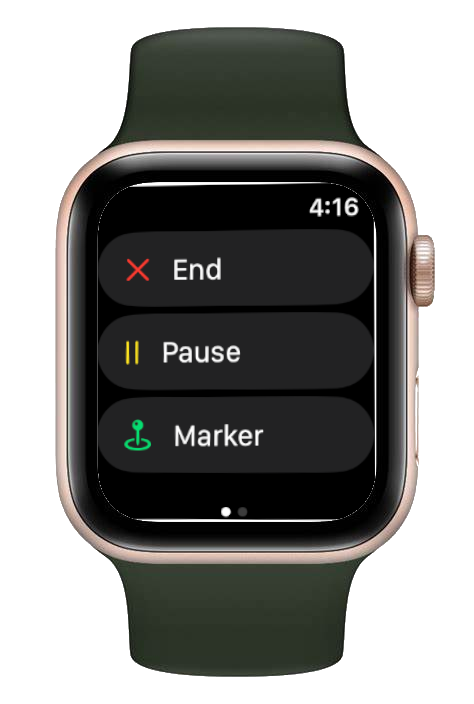
Swipe left on the Apple Watch to display the control UI which allows you to pause/continue, end the track. After ending the tracing, you can view the fitness records in the the built-in “Fitness” APP on your phone.
4. Add Marker
After tracing starts, you can click the upper right corner![]() , and select “Marker” to add a marker at the current location. You can also take a picture using the camera and add it to the marker by selecting ‘Take Photo’. You can also click “Save” below to save the taken photo to Photos App.
, and select “Marker” to add a marker at the current location. You can also take a picture using the camera and add it to the marker by selecting ‘Take Photo’. You can also click “Save” below to save the taken photo to Photos App.
Slide your finger over the image to display a square with a green border. Click the “Edit”>”Cut” button below to cut and enlarge the image within the square.
After editing the marker name, click “Add” above.
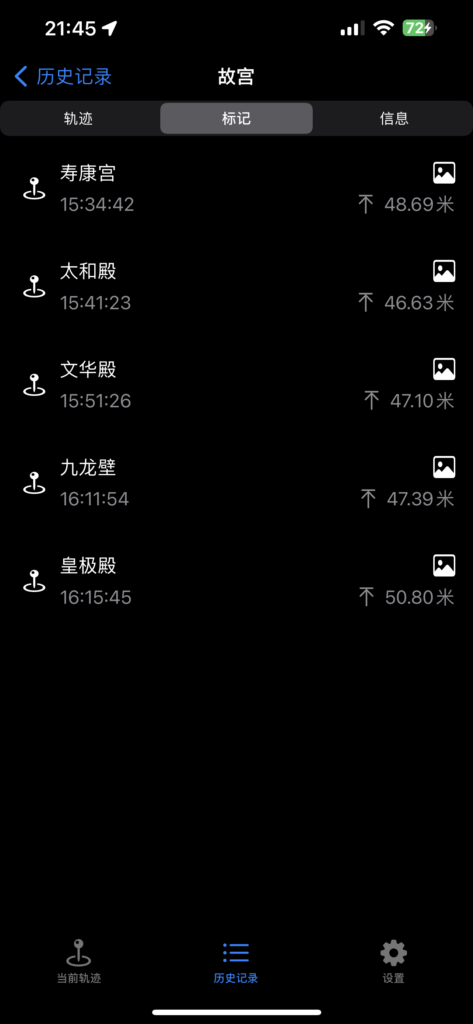
Click on a marker added on the map to display marker information and thumbnails.
Click the upper right corner![]() , select “Traces” and click on the track, select Marker page above, you can browse the marker list of the current trace, long press the marker name, you can edit or delete the marker.
, select “Traces” and click on the track, select Marker page above, you can browse the marker list of the current trace, long press the marker name, you can edit or delete the marker.
5. Browse tracks
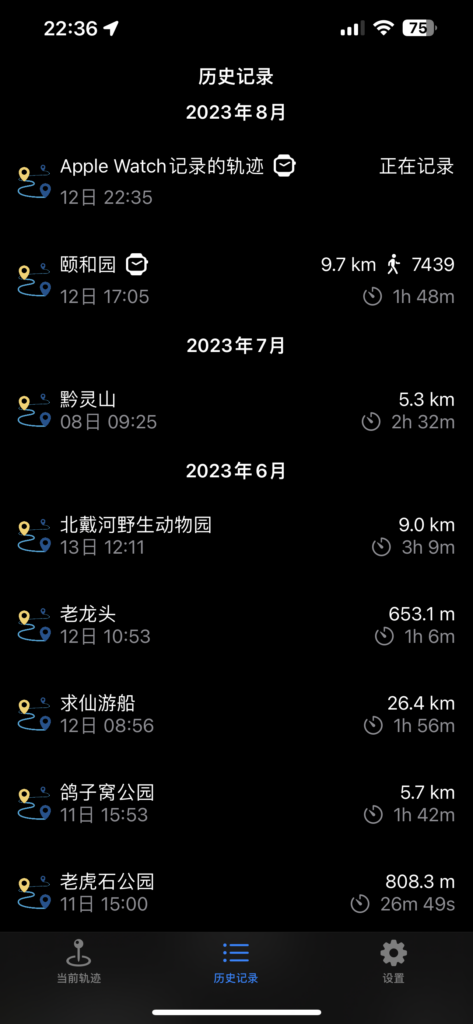
Click the upper right corner![]() , select “Traces”, you can view all tracks, including the track name and start tracing time.
, select “Traces”, you can view all tracks, including the track name and start tracing time.
long press the track name and select “Delete” to delete the track or select ‘Edit’ to change track name.
Click the corresponding track name to view the track detail.
Click upper right corner ![]() , following options will show:
, following options will show:
| Export to GPX | export the track as a GPX file. On other devices, enter “History” page of 《Journey GPS Tracker》 app , tap upper right corner |
| Continue Tracing | Continue tracing and add tracked location points to this track. |
| Edit Track Range | Select the range of displayed track points, and click “Cut” to delete undisplayed track points. |
6. Settings
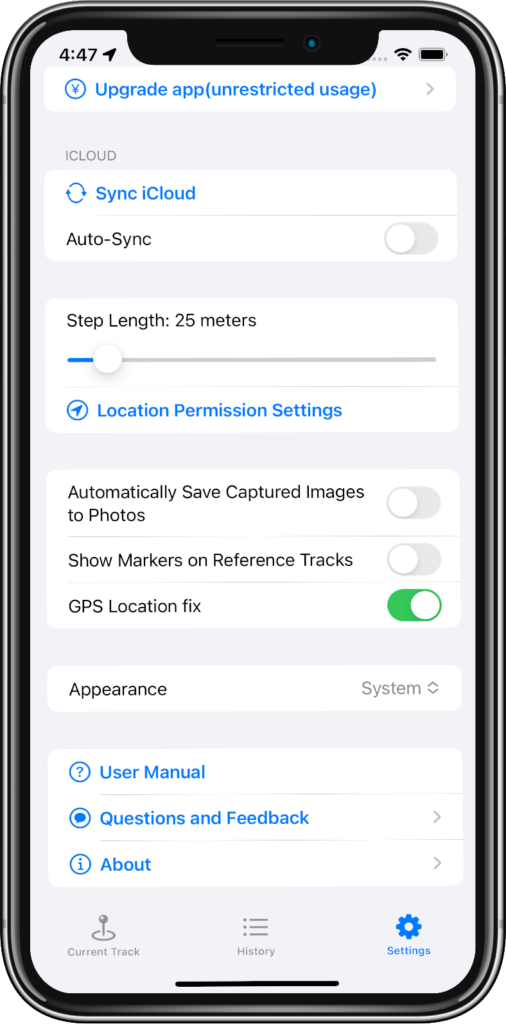
Click “Settings” below the app to see the following settings:
| Sync iCloud | To avoid data lost, click this button to sync tracks records to iCloud, or synchronize data between different devices(each device must login to same iCloud account). The local updates will be uploaded to iCloud, and the remote changes will be downloaded to local device. Note that if you have updates on same field of the same trace from both local and iCloud, the local update will overwrite iCloud update. |
| Auto-Sync | Automatically synchronize iCloud every 2 minutes. |
| Step Length | See section 2. |
| Show Markers on Reference Tracks | When showing reference track on the map, also show track’s markers. |
| GPS Location fix | Fix GPS Location shift problem in China mainland. If you notice a GPS track deviation in other region, you can try to cancel this option. |
| Location Permission Settings | Set location permission. In order to use this application normally, please set location permission to “Always”. |